
Being an Urban Gardner I’m kind of limited to what I can grow, or how I can grow at least. Worst still, my back garden is paved with just a border of soil. Since I’ve been growing I’ve been using Plastic Greenhouses, as the strap line says; I got a Greenhouse for my 40th Birthday and these are my adventures with it.
Except, I don’t have that Greenhouse anymore. Perhaps I should amend that strap line…? I do still however rely on bits of plastic propped up and kept in shape by a metal frame. And on occasion, duct tape. And, tie wraps.
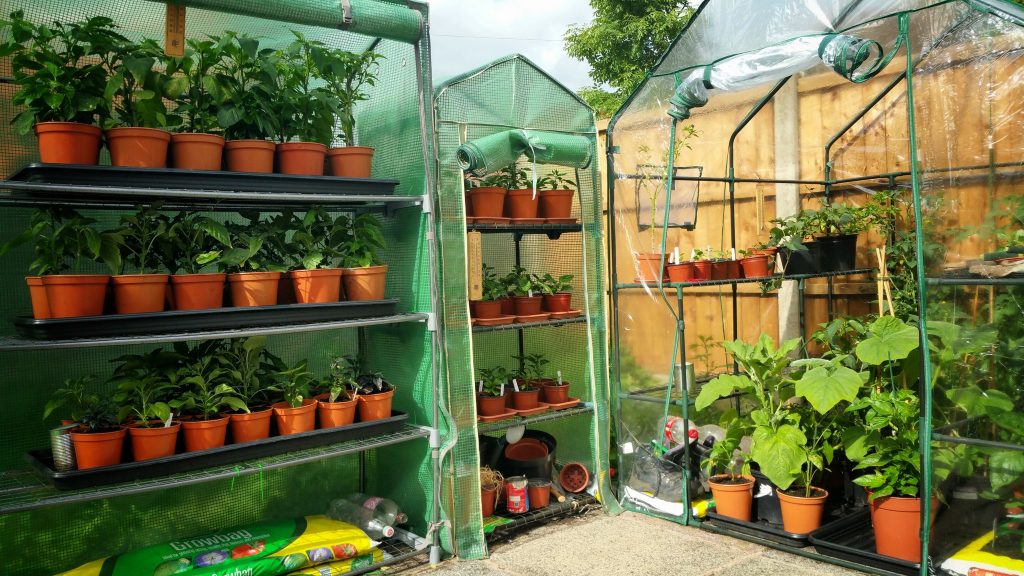
I do ok with them to be fair. Mostly…

Some days are better than others. And that wasn’t the first to fall.
So, I was looking to up my game a little and a little something wandered into my life randomly at a Garden Centre. It was the end of the season and I happened across this…
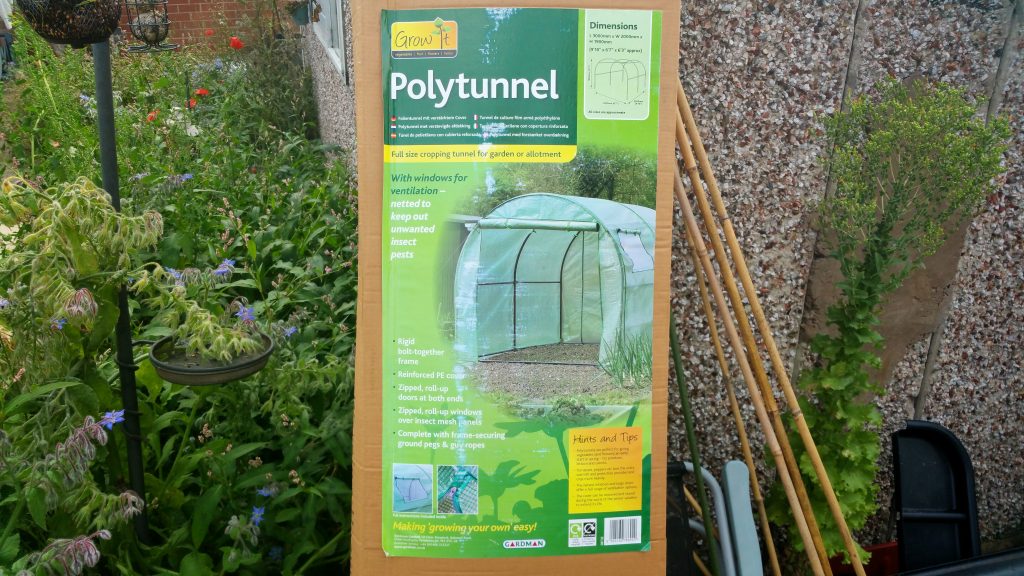
A half price, on sale, get rid of it quick before the Christmas stock arrives, Polytunnel! A Gardman 08732 to be precise.
And, I guess it’s not really a spoiler to say I bought it. As it’s sitting in my (rather unkempt, end of season) back garden.
The original idea was to wait until next season to put it up, but, honestly, I couldn’t wait, and some of my bigger plants would appreciate the room anyways as things where getting crowded for them.

The packaging says that it’s a two man job. 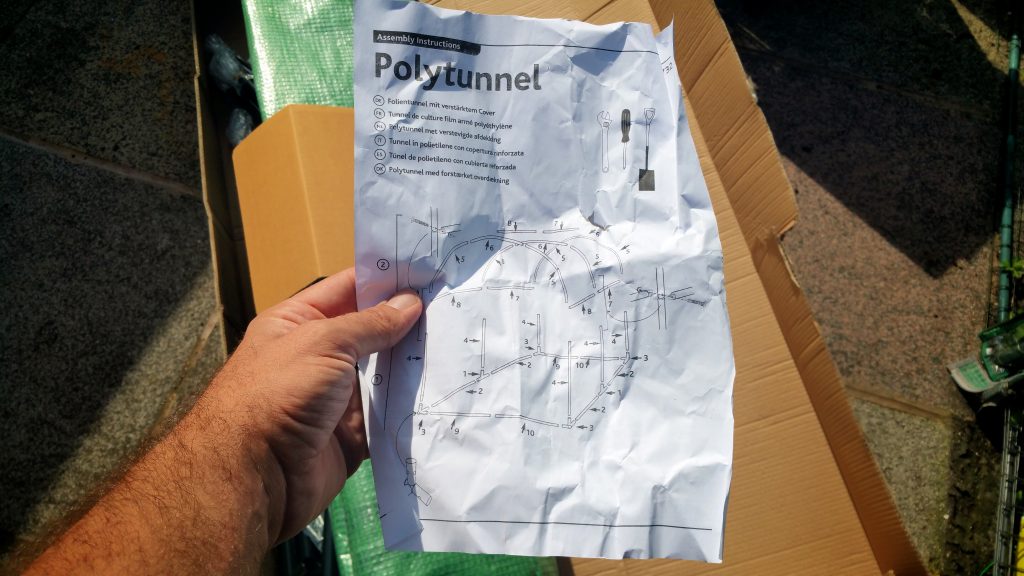
But, no. This was something I could do on my own, right?
I started unpacking it, and it wasn’t long before I was happy. It was immediately obvious that the quality of this Polytunnel was higher than I’d used before. The metal poles that form the frame are quite heavy and thick. Not like the flimsy things I’d used before that threatened to bend. And, did in some cases bend.
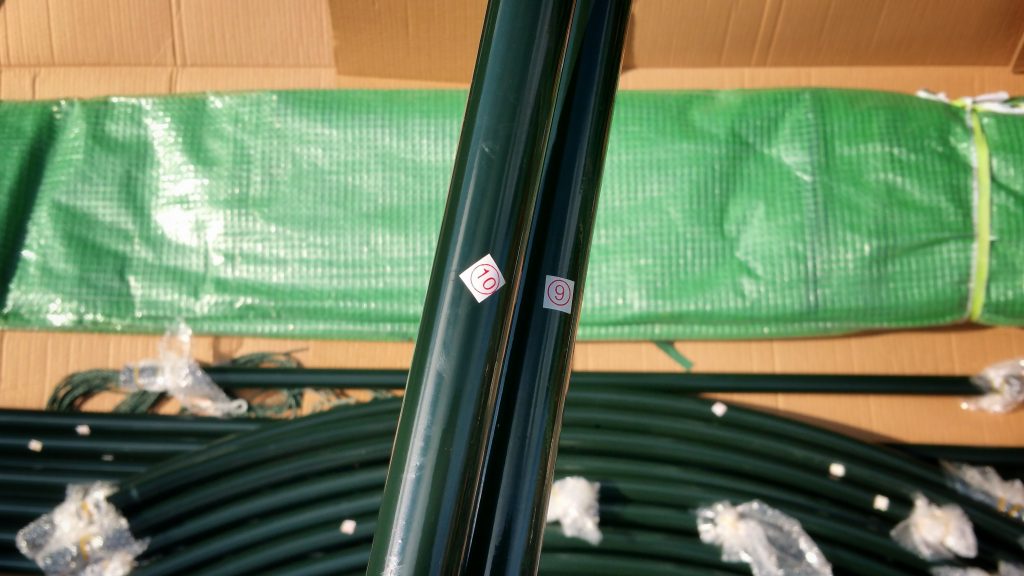
Each piece was numbered as well so there was no guessing which was which and what needed to go where.

I was also seriously impressed with the connections they made to each other as well with their little locking nugget things, clicking themselves into place instead of ominously sliding into each other. No need to reinforce these connections with duct tape then!

Similarly the connecting sockets which guide the metal tubes had the locking mechanism as well. This made putting it together a breeze as you can’t really stick the wrong pole into the wrong place. Great little idea, and so simple as well.
The best part about it all though was the way the all the major parts actually, properly bolt together.
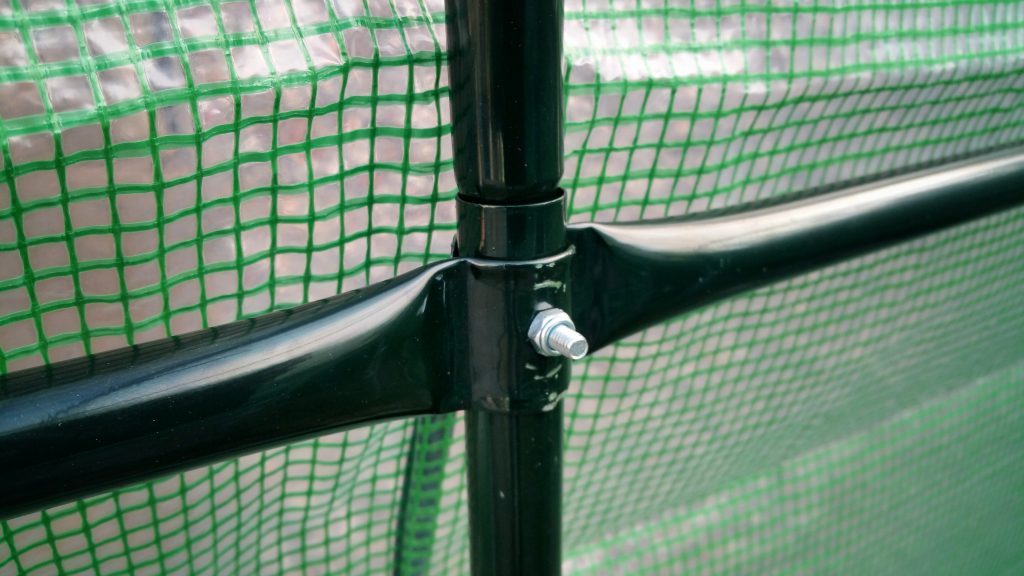
The one junction holds together the poles at the side for the wall, the roof support walls, and the roof. With an actual bolt. That isn’t going to come apart any time soon and there are three of these down each side.
This was actually the one part of the build I did struggle with, getting the poles on either side, and the roof connector coming down from the top was a little difficult to line up properly. But, not impossible with a little perseverance.
OK. It might, possibly, have really needed two people at this point. But, I got through it. Just.
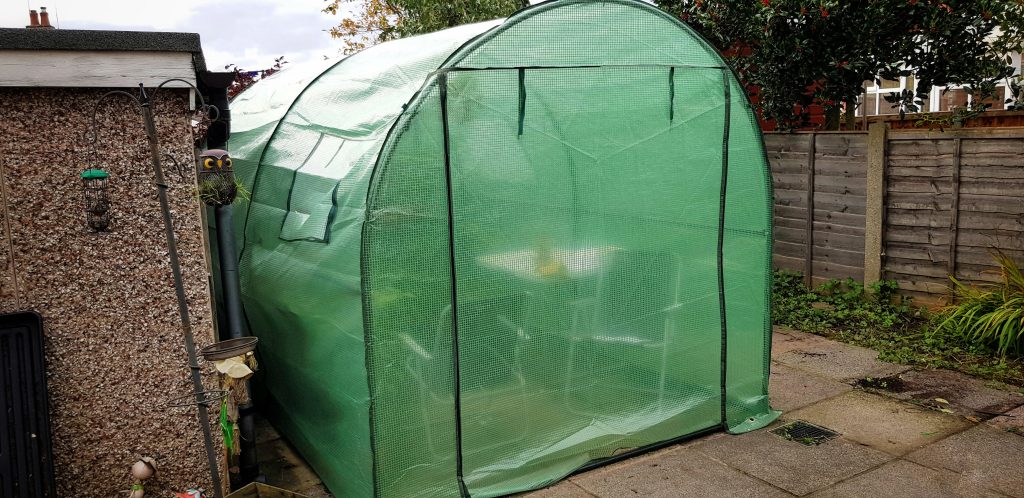
It’s not the biggest of tunnels when completed but I’m 6ft 4″ and can easily stand up in it.
If you look closely at the picture above you’ll also notice that I’ve got a table and some chairs in there as well. Not that I plan on making it some kind of “office” or anything [ahem].
Some of you might be looking at this and be thinking to yourselves “So, that is all well and good, but you’ve put in concrete. What about when it gets windy?”
Well, bearing in mind I’ve become somewhat astute at putting flimsy bits of plastic held up by metal rods in my back garden over the past couple of years I tackled this the best way I know how. By weighing it down.
The frame for the Polytunnel is actually quite heavy when it’s built, so, we’re off to a good start. To help however I first of all tucked the plastic underneath the inside of the frame and weighed it down some more.
First of all, some bags of stones in the corners.

And then, growbags placed over the frames at strategic points…
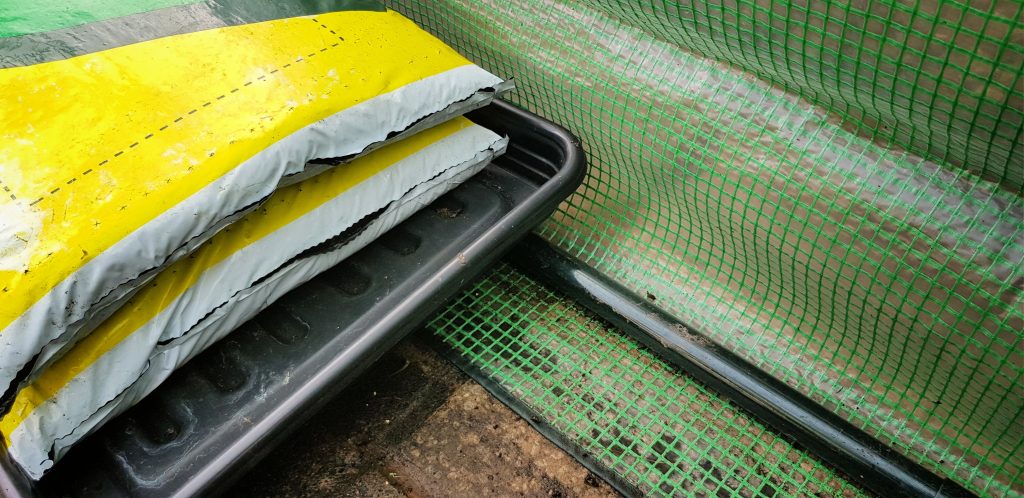
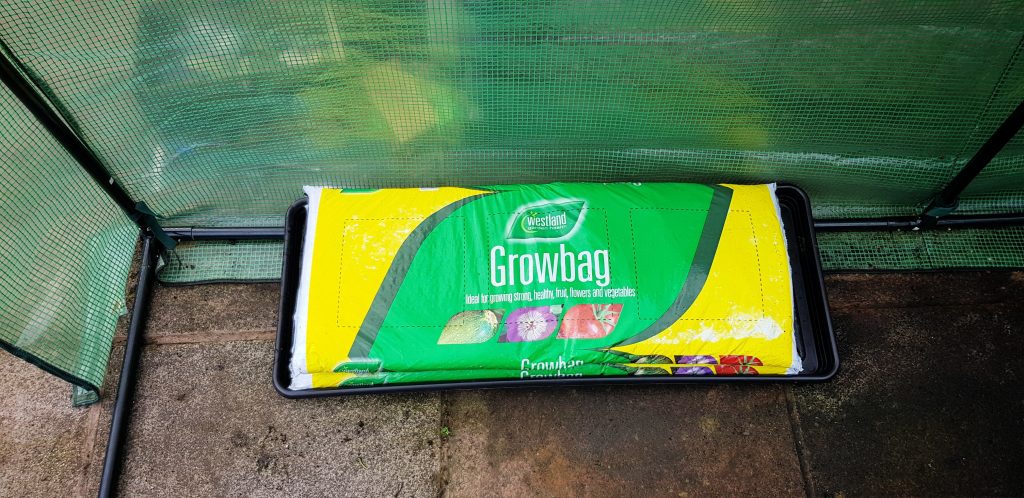
Am I confident that will hold up? Well, yes.
Truth be told I don’t imagine that this is where the Polytunnel will be next year, I’m hoping to move it to the corner of the garden but I need to do some work first. Once it’s there I will likely find a more “permanent” fixing solution, but this seems to work for now.
All in all I’m very impressed with this buy, it won’t see a proper use till next year now but it has given my plants some breathing room as we run into the end of the season.
Gardman 08732, I look forward to many growing years ahead with you!
Sounds like a nice piece of kit – definitely a step up from its predecessors! Remind me again how it’s secured to the ground to stop it blowing away…?
Bah – I should have mentioned that Mark, good catch!
It’s not the lightest of things anyway, it’s easy enough to lift and move but you’re not going to do it accidentally.
The cover has good sized flaps around the edges, I’ve tucked them under the frame on the inside so it sort of weights itself down a little (?). I originally had bags of stones over the frame and onto the flaps which seemed to work well. It moved just slightly in the one of the windiest days I’ve seen so far, and I mean slightly – I was quietly impressed with it actually.
I’ve now got the other Greenhouse(s) in there which are weighed down the same as they where outside over the flaps which seems to be doing the job just as well, if not better.
I’ll get photos of it all tomorrow and update the post 🙂
Hope you get this message. Not sure when your original post was written. How is the poly tunnel holding up now as considering buying one of these but slightly bigger.
Hi Louise
I’m still using it after 3 years if that means anything – That being said, I’ve had to replace the cover twice due to it being damaged in the bad storms we’ve been battered with.
I don’t hold this against the polytunnel itself. To be honest it stands up quite well to the wind all things considered, it’s when the big storms start and I guess it can only take so much of a battering. I’ve seen far more professional setups than mine suffer the same problems.
The frame itself remains solid enough, not had a problem with that at all – I’d guess that if you are in a better position to secure the cover to the ground, using it on grass for example, it’d fair better – I have to have it loose on concrete slabs so the wind can get hold of it more easily.
Storm Ciara has just claimed it as victim this year 🙁
https://www.facebook.com/TheChilliDiaries/photos/a.978439842219907/2894154263981779/?type=3&theater
The replacement covers vary in price so make sure you shop around if you do end up having to replace them, the replacements for this one vary between £50 and £100! – When I’ve needed them I’ve kept on eye on the prices on both eBay and Amazon for a good few weeks or two and jumped on them when they’ve dropped – I guess seasonal demand plays a part in it.
Good luck! 🙂
Hi, I’m looking at a U.S. version of this now and would love to know how it worked out during the winter in terms of staying warmer inside than out. I live on the central coast of California and it rarely gets below the 40s (F) here, so I’m really just looking for something that can extend my growing season for some of my summer plants (most of them continue on her up until November outdoors). So if this greenhouse can maintain temps even 15-20 degrees higher inside than out during the day, I’d be good.
I look forward to your reply!
HI Lee
I wouldn’t like to give a definitive answer if I’m honest – It definitely stays warmer in the Tunnel than out but I wouldn’t go so far as to say 15-20 degrees.
That being said, I do live in a very wet and cold part of the UK which no doubt plays a factor, I’d guess it would do better under in a more favorable environment.
When the weather is mild here it does get warm enough to give my plants a good start and lets me keep them outside to harden off a little without worries of losing them.
Sorry I can’t be of more help – The central coast of California is a world apart from my little part of the world I’m sorry to say! 🙂
Good luck – I’d be interested to know how you get on if you do end up trying it out 🙂
Hi Paul,
I’m like yourself looking for something like this for a concrete area in the UK, though I’m intending to use as a work area / paint booth.
I’m also looking at the Gardman in particular as it has a entrance at both ends (the only space I have in on the driveway in front of the garage, so I need to get through rather than around it).
I’m especially interested in your experiences of the zip as on Amazon a number of people said this was the weak point.
I’m also interested to know if the replacement covers you got were Gardman again
Excellent blog and a good read. Thank you
Hey Richard
Thanks for the kind words – Appreciated 🙂
I don’t know if I’d call the zips a particular weak point, I’ve never had them break on me as such, BUT; On other plastic greenhouses I’ve got, over time the zip fastener becomes brittle due to being baked in the heat and they do eventually break, I think the longest I’ve kept one without replacing the cover is 3 years.
If anything was the weak point on this cover I’d say it was the straps that hold it to the frame.
They seem to become detached from the cover in high winds and once they’ve gone then the zips do tend to come open because of the force, which of course lets even more wind in and doesn’t help the straps keep to the frame.
That being said, last year I used some washing machine weights to hold down the cover by the eyelets you’d normally put the tent pegs in. These are found quite near to the door zip. I just used a few tie wraps through the holes in the weights and through the eyelets. This, so far, has helped a lot in keeping the cover from ripping itself off the frame.
I’ve always bought the Gardman replacement covers, never quite trusted the other ones of this size for some reason – I’m a “stick with what I know” kinda guy when it comes this kind of thing.
Probably best to warn you that the replacement covers can vary wildly in price, some on Amazon are as much as buying a whole new Tunnel – I did find that https://www.oasisgardening.co.uk/ sold them at a reasonable price last year, quick and easy to deal with as well – However they aren’t currently listed on their website.
I’d highly recommend shopping around for them if and when the time comes to replace it.
Hope all of that is of some help to you – If you want to know anything else then please feel free to give me a shout 🙂
Thanks Paul.
I’ll let you know if I get one and how it works out
I just wanted to comment that I purchased this polytunnel around September of 2020 so I could have a “summer garden” in winter. I live in a very mild climate (California central coast, USDA zone 9b/10a), and my house is low on a hill and very protected by surrounding properties. I put it up in a corner of my yard, so it’s protected on 2 sides by a fence. Since I wanted to grow summer veggies and fruits in the winter, I needed to do a lot of mods, which included: insulation (solar pool cover over it, completely lined with bubble wrap inside, and reflective bubble insulation on the north side), another sheet of plastic over the solar cover to ensure no leakage, as I cut out an opening flap in the solar cover over one of the tunnel windows for ventilation; LED grow lights; a 400 Watt oil filled heater attached to a digital thermostat; 3 small, rechargeable fans; and I constructed some horizontal support beams from metal conduit pipe, attached with specialty hardware. The support beams are for additional strength and to hang the LED lights. With the grow lights alone on, the temp is usually at least 10 degrees warmer inside than out. With heat and lights, it can be 15-20 degrees warmer. At night when 40F outside, lights out and heat on, it averages mid 50s inside. Insulation is absolutely necessary to keep it warm once the sun is gone.
It’s been up for 3 months and I have tomatoes, blackberries, strawberries, cukes, bell peppers, many passion flowers, etc. growing. I LOVE my greenhouse! We recently had an unprecedented wind storm like nothing I’ve seen here, and my greenhouse barely moved. I do have it weighed down on the inside with my plants large grow bags, as well as attached by lightweight cords around the perimeter. I’m sure if it was not in such a protected area, I’d have had a different result.
Regarding the zipper- yes, they suck. The pull tab on the main one I use broke off recently. I tried to remove the pull tabs from the zippers I don’t use right now, but each one broke when I tried to remove. The zippers themselves still work, but the tabs are garbage.
I am very happy with this structure. I also like that once it warms up again I can simply remove the covers and leave up the frame, so I won’t even have to move all my 25 gal grow bags out. And I can leave up the passion flower arch that I’ve grown across the ceiling of the frame.!
Good to know you’re getting on with it OK – Sounds like it’s keeping you busy!
Interesting comments about the zipper tabs – I’ve never had that on mine but Richard did mention that they where a cause for concern on the Amazon reviews – Maybe I’ve just been lucky?
Thanks for taking the time to come back and let us all know your thoughts 🙂